
Call Us
(07) 5479 6652


Photo: Josh (left) and Claudia (Right)
Claudia & Josh from the Accelerate Off-grid Touring team run you through basic fault finding and troubleshooting techniques for your 300 Series DIY Dual Battery kit.
Lets dive deep into the basic fault-finding tips with this battery kit, from how to jump-start your flattened battery and to where to find your fuse, and other newly added accessories that have been added to this 300 series.

Josh & Claudia, shares some tips and basic information What do we do if we drain the auxiliary battery flat?
“Every now and then, we’ve get a couple of questions from people out on the road. One of the main questions is, what do we actually do if we drain this flat cause we haven't been monitoring our app properly?' - Claudia
“So if you drain the Invicta lithium flat, completely fine. Doesn't harm the battery as such, the battery's actually designed to go into a shutdown state if it goes past a certain point of charge”. Josh initially responds. “ To do that, what that means is then we need to wake that battery back up for it to receive charge. It's quite simple”.
“Basically all the DC-DC charges as part of our kit have a built-in wake up function. What that means is, it pretty much outputs 12 volt power regardless if it sees the battery or not, to wake it up. So you should just be able to start your car and once the charger kind of kicks in, starts charging, it should wake your lithium battery up. In the case that the charger doesn't wake it up, which is very rare, but it does happen cause the battery has gone past a certain point where the charger's not enough”.
“It's essentially very similar to jump starting a flat car, like a flat start battery, a car that won't start. What the battery needs to see is just 12 volts across the top of the battery, be it from another car. The most common one that I suggest and have used myself is just a portable jump starter, like a lithium portable little jump starter. You just hook that on, pretty much give it 12 volts, start the car and it should wake up and start charging. The key things you'll know when your lithium's flat, obviously number one, your beer will be warm and your fridge won't work and you won't be able to see the battery on the app either. So if you can't connect to it, can't see it on the app, it's most likely because it's in a shutdown state”. Josh in in- depth overview.
“Gone flat, yep, cool, easy but easy enough to turn it back on again, which is really handy.
Another question we get asked is, yes, my batteries got charge but I'm not seeing any vehicle input through the app or maybe flashing lights on the red app charger. What's the first sort of thing that we would look for?”
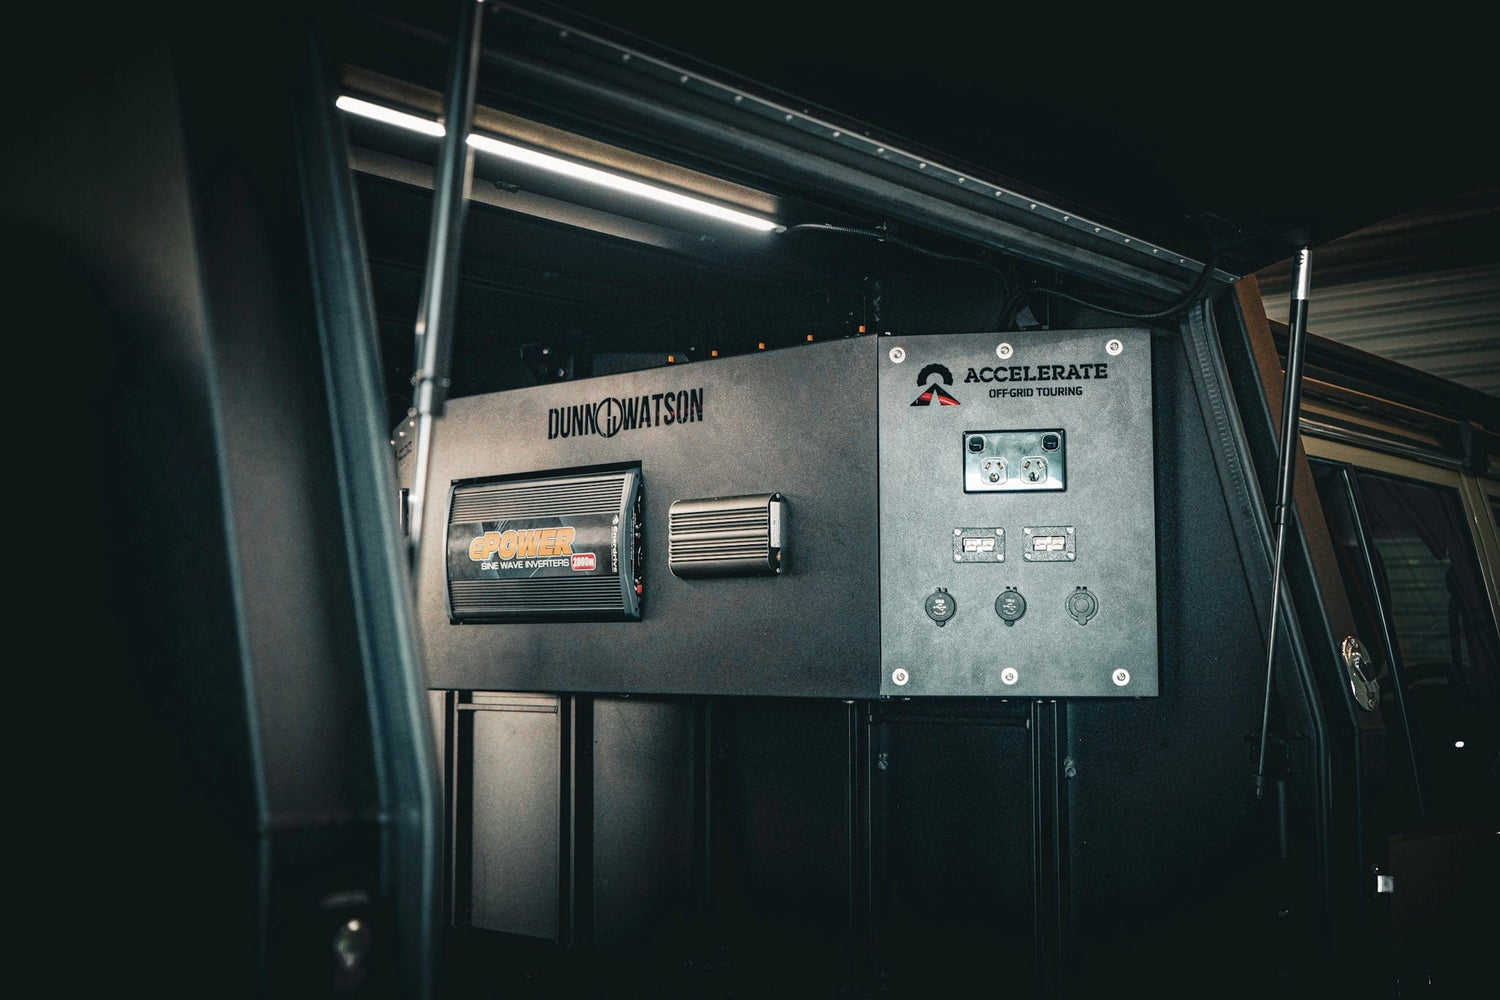
Check the fuses. So right on top of the battery here on our kit, we've got some what they call midi fuses. So the first lot of midi fuses is our DC in and DC out. Now to explain that, DC is basically direct current, 12 volt. Our DC in, is our vehicle input. So that's actually the charge from the start battery and the alternator to the REDARC charger.
Check the output to the auxiliary battery to charge that. So there's two fuses on top of the battery here. We can just pop this cover open and pretty much test light or a multimeter.
Check either side or visually look at 'em as well. So they've got a clear top and they're very obvious when they're blown to be honest that you, you see the blown burnt mark. If you're unsure, quick test light over the each side will tell you what's going on.

“This is a midi fuse (see the photo above), the reason (why) we use midi fuses is they are a bolt in style fuse”. Josh emphasised. “So they're a much better connection than your charge circuits anyway, than your standard blade styles. Blade style fuses, they get a bit of resistance in them and can melt quite easily”.
And they're easily replaceable aren't they? Claudia asked.
- (Nodded) Yep.

“To replace them for convenience, they've got a Phillips screw head in the middle of them or they are just a standard eight mil bolt”. Josh keeps going into detail. “You just undo those, pop the fuse out, pop it back in and away you go. Now disclaimer, with anything as when replacing fuses, especially on the positive side, so the live side of the system , it's always best practice to disconnect the batteries just to avoid any arcing in on as such”.
“We also occasionally get the following question: I can see the battery percentage on my app, but when I plug my phone, lights, and fridge into the back socket bank, nothing happens. Usually, this is because there's a fuse in the back socket. Where can we find the fuses for the back sockets? Claudia threw in another question.
“So again, on our top plate of our dual battery tray, we have our socket fuses towards the back. So, we run two power supplies into the rear. The reason we split it into two supplies to our socket bank is so you can have a dedicated circuit for your fridge and a dedicated circuit for the USBs, the sig sockets, kind of the other stuff. Reason being, if you were to loop 'em all into one fuse and you plug in your camp light, that's been, it's 15 years old and it blows a fuse, again, we end up with warm fridges. So, it's pretty much the same as the DC in and DC out fuses. They're a midi style fuse. These two are both 30 amp circuits and the exact same we can flip the cover up. Again with a Filler Pad or an eight mil socket swap those fuses out if they were to blow”.
“Another one is when these 300 are set up for towing, we run an isolated Anderson plug to the rear being able to charge, you know, batteries in your caravan sometimes that might not have power to it. Again, can be fuse related. So where would those fuses be located on the kit?”

“So surprise on top of our dual battery tray. So we've made it very convenient as well. So if you opt for the towing setups as part of the kit, it is they're mounted on the top here in the middle. So we've got ISO, which is pretty much short and stands for our isolated Anderson plug circuit. So that's the Anderson plug at the tow bar to charge caravan. Other one up here is the ESC fuse. So that's your electronic stability control. Some caravans, their ESC powers up off the caravan batteries, some power up off the vehicle through a red Anderson plug. So I would just recommend checking with your caravan manufacturer on that one before opting for ESC, 'cause it's a bit all over the place depending on the van manufacturer.

The other thing that is part of the towing setup is the circuit breaker for the Redarc tow Pro elite. If you opt for that as well, that's actually located down on the side of the tray. So that's a 30 amp auto reset circuit breaker. The reason we use an auto reset circuit breaker on a tow pro and mounted on this kit, is in the, in the event there is an issue with the brakes, obviously that circuit breaker will tick off and then after, I think, after a period of time it will re-engage again. So even if there is a short or a reason, you know that circuit break is faulting, you don't lose all of your brakes. 'cause when you're towing a three and a half tonne van, that's the last thing you want. The last thing that is part of the towing kit as such is on the side of this tray, again, tucked outta the way is our relay. So there's a 100 amp relay there that is triggered by the ignition circuit and that just switches the isolated Anderson plug on the rear via ignition. So there's only power down there when the car's running. Josh concluded.
Our under bonnet 300 series kit is under the bonnet and now we're going to pop round to the back of the car now 'cause that's where all our sockets are and a really cool feature I wanna show you. All right, so we're in the back of this 300.

Now this is where we mount our socket bank. So we've made a custom socket plate that we mount into the rear seat cup holder and that's where we put all of our dual USBs and 12 volts cigarette sockets. This one we've also got two Anderson outputs as well. So plugging anything from fridges to lights to mobile phones, charging cameras, everything like that. Super, super handy. Easy to access and really functional as well. So that really cool feature
I mentioned before was it's really simple but really cool at the same time. So it is a tail light. So this one is a custom made one by JBA fabrications. They're in Melbourne. We actually met them through our RV Storage Solutions, the guys that do all of our draw systems for us. So he came in and saw us last year. We absolutely loved this light and we've done quite a few of them now, but haven't touched on it a lot.

So it's a flush mount light, it sits completely flat so when you close your tailgate, you can't knock it off, you can't damage it. The light itself is actually recessed into the plate, so it's really flush really neat. It's a tricolored light as well. So they provide this little dial, so it's an-off-on dial. So one is a white light. It really helps light up the back of the vehicle.

Then you also have your orange light, so when you're out camping, mosquitoes, stuff like that, they're not gonna be attracted to this orange light and your car isn't gonna be invaded by bug. So picked up, on loved and now it's a common thing that we install in pretty much every 300 build.
Another 300 series accessory that we, I guess fell in love with. Again, like the, like the light is the Advanced Ice Trailer Bracket. It's now just a standard installation on any 300 series. It looks so much neater than doing your flat plate. This is again, especially designed for the 300, there's a big mount sort of arm that sits up here. It's got your pre-fabricated, was a connection mount.

You've got two holes here that's for your airbags, your manual inflation valves. You've got space for up to three Anderson plugs. So if you do need another one, we can put it on there. Space for a seven or a 12 pin trailer plug and obviously a breakaway on there as well. It keeps it looking so neat and tidy and much better than your old school flat plates.
All right, so that's everything we've done so far on this car. Thanks for tuning-in of one of our run throughs on these Epic 300. We do quite a few of them now. If you're interested in one of these kits, you can purchase them off in our website. If you want to watch our YouTube video , please click the link here.
If you would like a quote for any of these products to be installed please get in touch via the links below:
Our team of highly qualified and experienced auto electricians and mechanics specialise in 4wd and caravan upgrades. Book in your phone call now to discuss the best options for your next project
Leave a comment